


News
- Home
- Service
- Product Center
- Application
- About Us
- Videos
- News
- Contact Us

2025-10-23 14:28:10
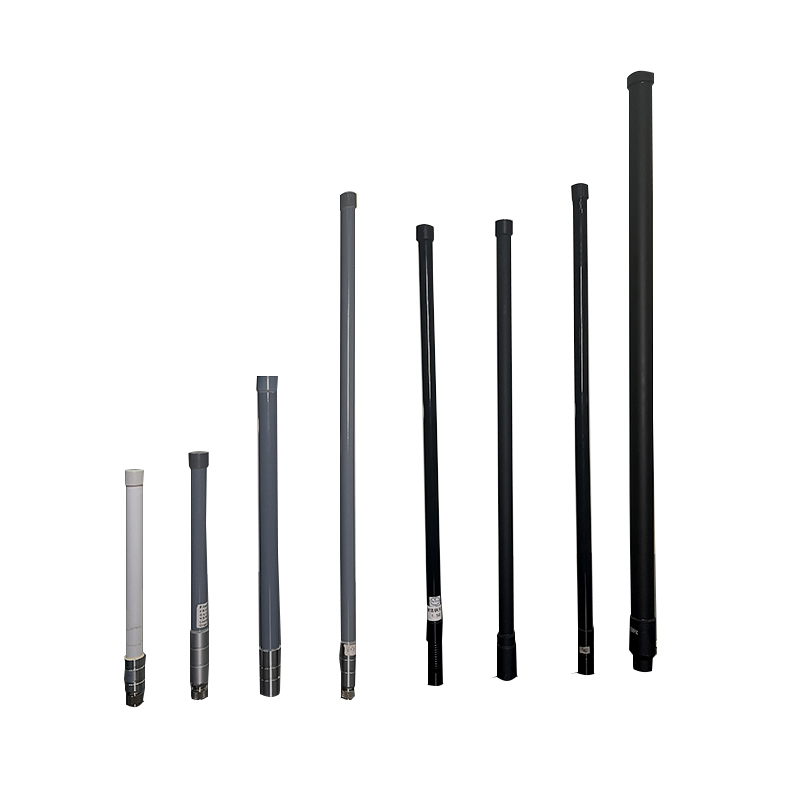
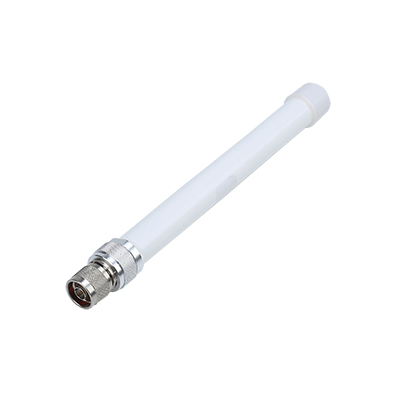
Installing an omnidirectional Fiberglass antenna requires following a standardized process to ensure signal performance and safety, while maintenance focuses on regular inspections and environmental protection. Below is a detailed, step-by-step guide.
The installation process is divided into preparation, on-site installation, and post-installation testing to avoid damage to the antenna or signal loss.
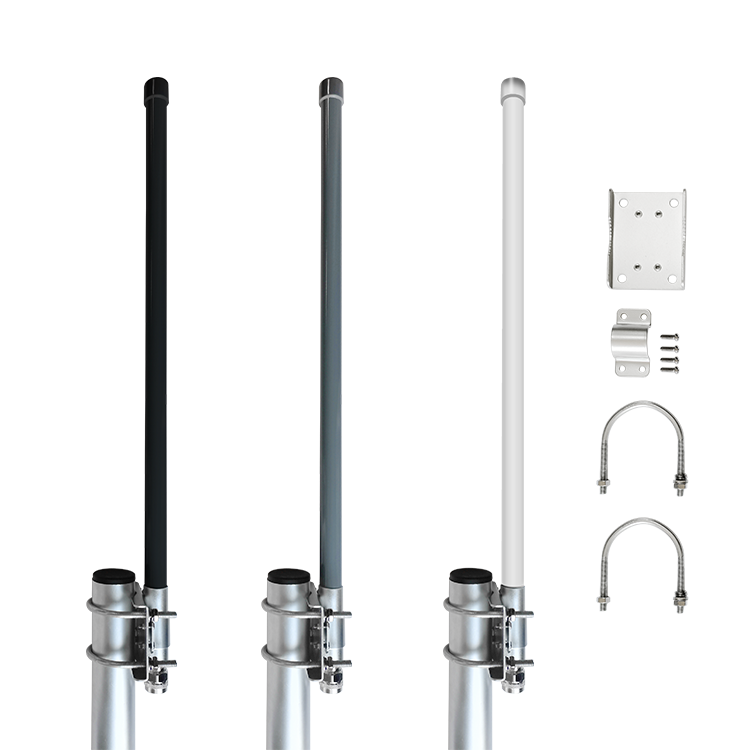
Tool & Material Check: Confirm all required items are available, including the omnidirectional fiberglass antenna, mounting bracket (pole/wall type), coaxial cable (matched impedance, e.g., 50Ω), waterproof tape, cable ties, a wrench, a level, and a signal tester.
Site Selection: Choose a location with no obvious obstructions (e.g., tall buildings, trees) within 10–20 meters. Priority is given to high points (e.g., rooftops, utility poles) to maximize horizontal signal coverage and reduce interference.
Safety Confirmation: If installing at height, use a stable platform (e.g., a lift or scaffolding) and wear fall protection gear. Ensure the mounting surface (pole/wall) can bear the antenna’s weight (typically 0.5–5kg).
Pole Mounting (Most Common):
1. Fix the U-shaped or hoop bracket to the pole (diameter matching the bracket) using bolts, ensuring the bracket is level (checked with a level tool) to prevent the antenna from tilting.
2. Tighten the bolts with a wrench to avoid shaking in strong winds.
Wall Mounting:
1. Mark the drill positions on the wall according to the bracket’s hole spacing, ensuring the bracket is vertically aligned.
2. Drill holes, insert expansion bolts, and secure the bracket to the wall; verify stability by gently pulling.
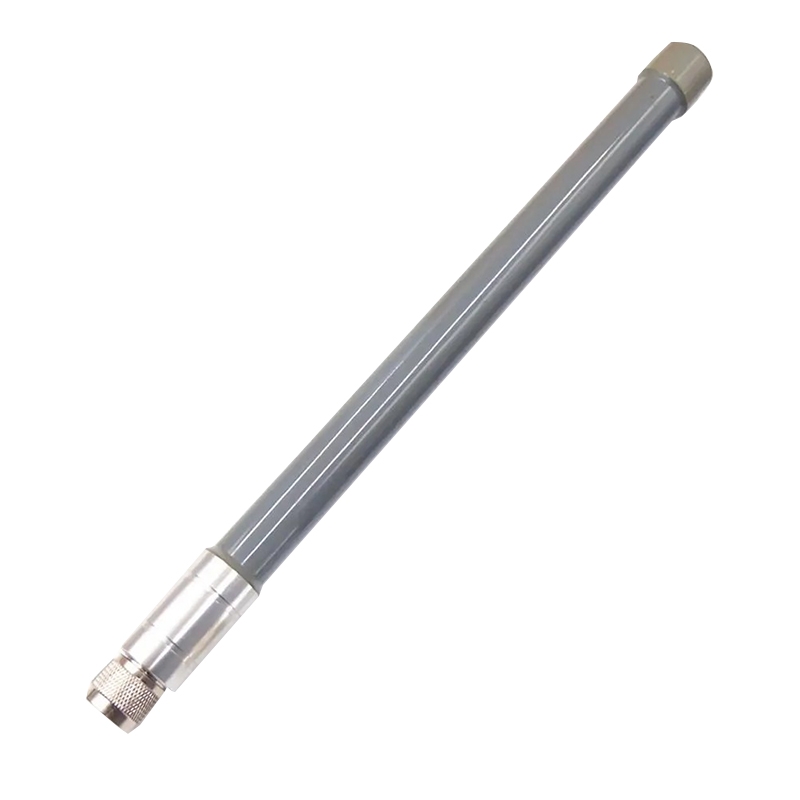
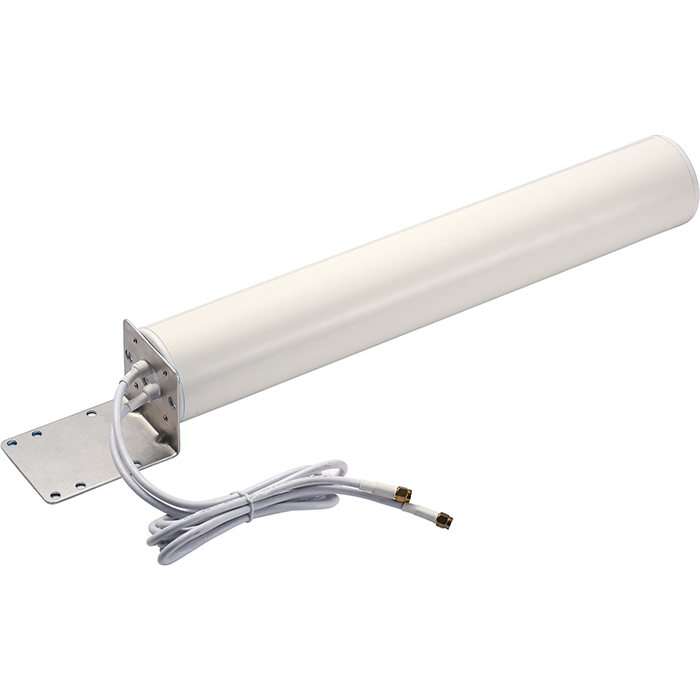
Attach the Antenna to the Bracket: Align the antenna’s mounting hole with the bracket, fasten it with screws, and confirm the antenna is vertically upright (critical for vertical polarization signal propagation).
Connect the Coaxial Cable:
1. Strip the coaxial cable’s outer sheath (3–5cm) to expose the inner conductor and shield layer; avoid damaging the inner core.
2. Connect the cable to the antenna’s N-type/SMA connector, screw it tightly by hand first, then use a wrench to tighten 1–2 more turns (do not over-tighten to prevent connector damage).
3. Wrap the connector joint with 3–5 layers of waterproof tape (from bottom to top, overlapping by 50% each layer) to prevent rainwater infiltration.
Cable Routing: Secure the coaxial cable along the pole/wall with cable ties, keeping it taut but not stretched. Avoid sharp bends (bend radius ≥10 times the cable diameter) to prevent signal attenuation.
Signal Testing: Connect the other end of the coaxial cable to the communication device (e.g., base station, router). Use a signal tester to check indicators like VSWR (normal value: ≤1.8) and signal strength; adjust the antenna’s height or angle if the signal is weak.
Omnidirectional Fiberglass Antennas are mostly used outdoors, so maintenance focuses on resisting environmental erosion (rain, UV, wind) and ensuring stable connections.
Visual Inspection:
1. Check the fiberglass radome for cracks, discoloration, or deformation (UV radiation may cause aging over 2–3 years; replace if damaged).
2. Inspect the mounting bracket and bolts for rust or looseness; re-tighten rusty bolts or replace them with anti-corrosion ones (e.g., stainless steel).
Cable & Connector Check:
1. Verify that the coaxial cable is not broken or worn; replace damaged cables immediately.
2. Check the waterproof tape at the connector—if it is peeling or aging, remove the old tape and re-wrap it with new waterproof tape.
1. Pre-Storm Preparation: Tighten all bolts and reinforce the cable with extra cable ties to prevent the antenna from being blown down by strong winds.
2. Post-Storm Inspection: After heavy rain or typhoons, check for antenna tilting, cable displacement, or water ingress in the connector; adjust or repair promptly.
3. Winter Maintenance (Cold Regions): Remove snow or ice from the antenna (use a soft brush, not hard tools) to avoid weight-induced deformation of the radome.
1. Signal Performance Calibration: Use a professional tester to recheck VSWR, gain, and signal coverage; clean the antenna’s connector with alcohol to remove dust or oxidation (improves signal transmission efficiency).
2. Radome Replacement: If the fiberglass radome shows obvious aging (e.g., brittleness, reduced transparency), replace it with a new one of the same model to protect the internal antenna elements.
1. Impedance Matching: Ensure the coaxial cable and communication device have the same impedance as the antenna (usually 50Ω); mismatching will cause signal reflection and power loss.
2. Avoid Over-Tightening: When installing the antenna or connector, do not use excessive force—over-tightening may crack the fiberglass radome or damage the connector.
3. Safety First: Never install the antenna near high-voltage lines (keep a distance of ≥10 meters) to prevent electric shock; stop work immediately in rainy or windy weather (wind speed ≥5/10.8m/s).


Address: No.1 Sankeng Qinghutou Tangxia Dongguan Guangdong China TaiWan office: 558-2 ZhongHua,Zhubei,Xinzhu,Taiwan
Copyright © 2026 Dongguan RenFeng Electronic Technology Co.,Ltd All rights reserved.